Introduction
The letter V is the twenty-second letter in the letter set, and we will more often than not see it reasonably habitually in the English language. It’s additionally one of the simplest letters to figure out how to compose. The capital and lowercase renditions of V seem to be indistinguishable, with the exception of the lowercase form being a piece more modest. Learn this blog and visit the latest drawing tutorials like Creative Landscape and nature drawing.
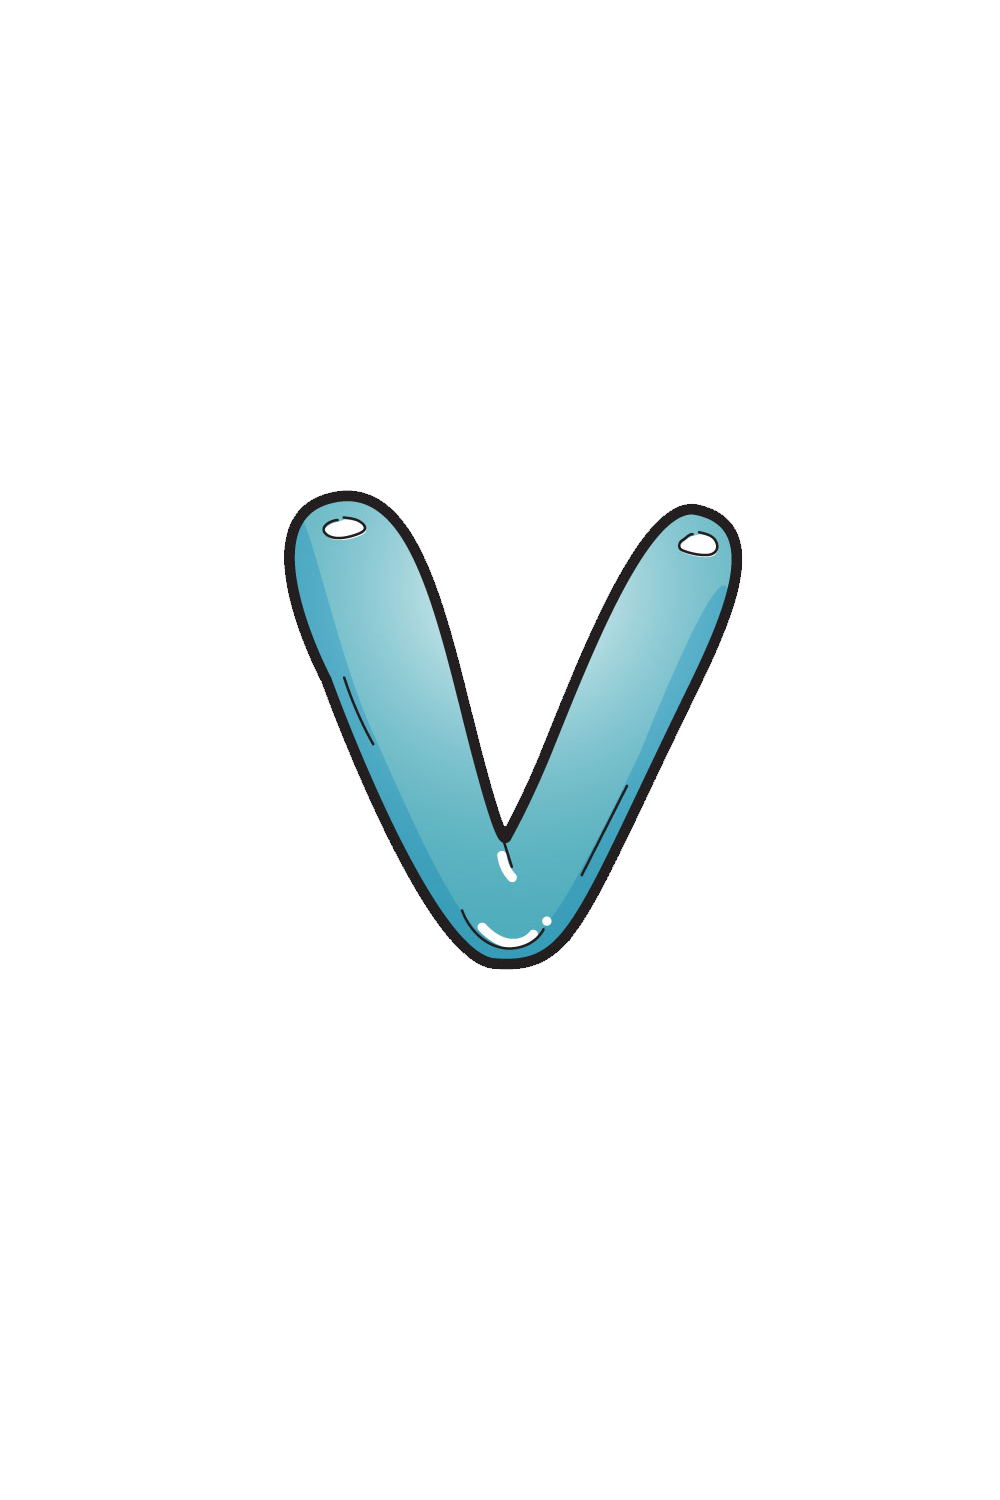
We know it’s a simple letter to compose, yet we’re here to make it somewhat more tomfoolery and exceptional. We will do that by figuring out how to draw an bubble letter V! In only 6 stages, you will perceive the way you can make a rendition of this letter that has a truly cool focus on it. Not just that, we will go over certain ways you can variety and add to the plan in your own particular manners.
Stage 1: Bubble Letter V Drawing
At the point when you take a gander at the letter V, it is drawn and composed by interfacing two inclining lines at a point at the foundation of the letter. We will basically be doing likewise with this bubble letter variant of the letter, and we will begin with the line on the left. In any event, for letters that are more straightforward like this one, we suggest drawing it out with a pencil first. This pencil form can be drawn like a typical composed V, as it’s only there to direct you.
Consider it a skeleton that you would draw the bubble rendition around. Considering that, we can define the principal boundary of the letter.
Stage 2: Bubble Letter V Drawing
We defined a seriously lengthy boundary in the past step, yet we will keep things easier in this step. In this step, we will broaden the finish of the past line up and afterward bended over. As you can find in the reference picture, you will wind up with a horseshoe shape that has one side that is significantly longer than the other.
Stage 3: Bubble Letter V Drawing
You had somewhat of a break with the past step where we drew simply a little segment of the letter, however in this one we will draw a lot bigger part. You can definitely relax however, as it ought to in any case be basic the length of you follow the reference picture and our aide!
In this one, we will continue to expand the line that we halted in sync 2 down in a genuinely sharp slant. We will make a turn when you arrive at the foundation of the letter. Right now, it will point up in the future in a sharp slant. This will be the primary line of the right-hand side of the letter.
Stage 4: Bubble Letter V Drawing
Presently we’re prepared to polish off the framework of the letter V we have been drawing. Similarly as with a composed letter V, the different sides ought to impeccably reflect each other.
Consequently, we will reproduce the initial not many advances in the future, simply in turn around this time. Proceeding the last known point of interest, keep the line inclining up a little.
Then, at that point, it will twist over at the top in the future and slant down once more. In the long run, it will meet the other line where it finished, finishing the layout of the letter. Presently all that remains is straightening out the lines and ensuring everything is doing great before we add a few last subtleties.
Stage 5: Bubble Letter V Drawing
Now that the diagram for your letter is finished, we will cause it to seem noticeably more appealing for certain straightforward subtleties. With these subtleties, we will make this letter seem to be a level letter on a page and more like an bubble letter that is a real item. The principal key to this is to draw a few intelligent spots on the letter. This will assist with making it seem as though the letter is made of inflatable plastic or an bubble.
You can accomplish this impact effectively by drawing two little ovals at each tip at the highest point of the letter. In any event, this is where we decided to put these shapes, however you could put them somewhere else assuming you need to.
Simply recollect that they will be projected by a light source, so adding an excessive number of these ovals might make it less successful. Then, you could show that the letter has a few volume and profundity by adding a few slim lines along the inward blueprints of the letter.
This will assist with making it seem as though this letter is loaded up with air. You could likewise mess with where you place these lines to make it more customized.
Stage 6: Bubble Letter V Drawing
With this bubble letter V, we have been intending to make it seem as though it is a 3D bubble or inflatable. We have previously begun doing this with the subtleties from last time, yet we can additionally do it with colors! In our reference picture, we chose to go with a light blue variety plot. However, you will see that we utilized varieties to give it more profundity.
You can utilize hazier shades of the varieties that blur into lighter shades to make it seem as though the letter has some profundity. The varieties ought to draw lighter the nearer you get to the intelligent spots we drew before. You can do this stunt regardless of which variety you use! We certainly urge you to utilize any varieties you might like. You could likewise blend and match various varieties to give this letter even more a rainbow look.